Overview
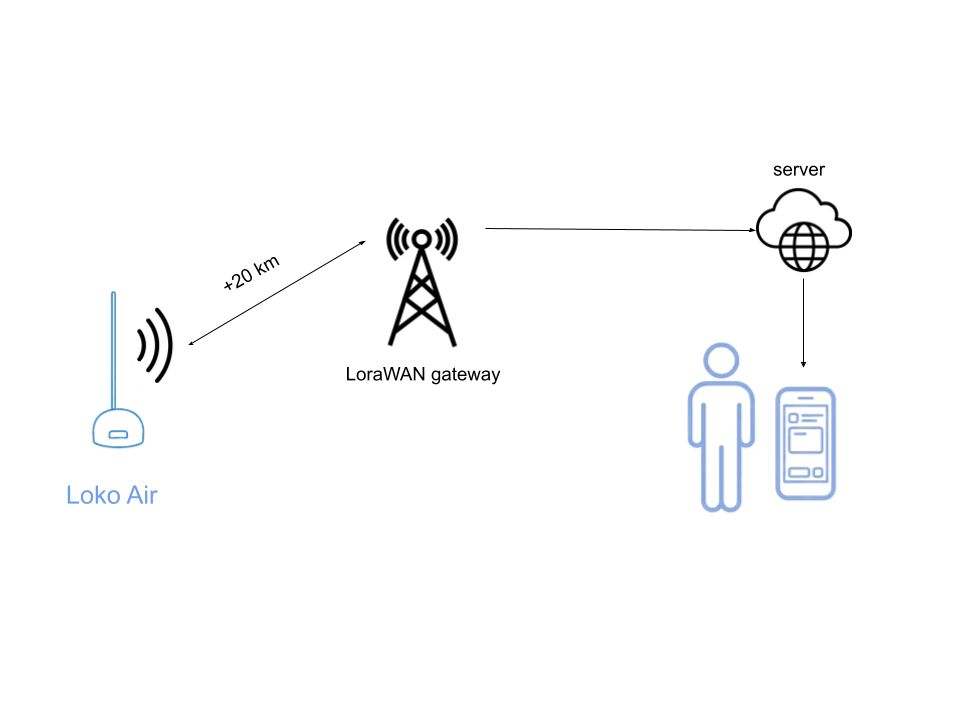
This comprehensive guide demonstrates how to configure your gateway and Loko device to establish a connection with TheThingsNetwork, enabling long-range LoRaWAN connectivity for your GPS tracking system.
Step 1: Create TheThingsNetwork Account
Visit The Things Network website and register for an account. After registration, navigate to the Console by clicking on the Profile Icon menu at the top right of the page.
Step 2: Regional Configuration
Select your geographic region from the available options. This is crucial for ensuring proper frequency plan selection. You'll then be presented with two options: "Go To Applications" or "Go To Gateways".
Step 3: Gateway Registration
If you're using a personal gateway, first configure it according to the manufacturer's guidelines. Then:
- Select "Go To Gateways" to begin registration
- Choose the appropriate frequency plan for your region
- Use the Gateway ID from your internet setup configuration
- Complete the gateway configuration process
Step 4: Application Creation
Access the "Go to Applications" section and click "Create Application". Assign a meaningful name and ID to your application for easy identification.
Step 5: End Device Registration
On your application page, follow these steps:
- Select "register end device"
- Choose to enter device specifications manually
- Configure the JoinEUI (this corresponds to APP-EUI in Loko Configuration Tools)
- Generate a Dev-EUI and App-Key using the provided buttons
- Complete the registration process
Step 6: Retrieve Device Parameters
After registration, access the overview page to obtain the activation parameters. These parameters are required for configuring your Loko Air unit in the next steps.
Step 7: Payload Configuration
Navigate to the payload formatters section and select "CayenneLPP" for uplink messaging. This standardized format ensures proper data interpretation.
Step 8: Loko Configuration Tool Setup
Configure your Loko device with the following steps:
- Open the Loko Configuration application
- Select the appropriate COM port and press read
- Enable LoRaWAN functionality
- Input the three required parameters from TheThingsNetwork (JoinEUI, Dev-EUI, and App-Key)
- Submit settings and restart your Loko Air unit
Step 9: Verification
To confirm successful setup:
- Monitor live data on the TheThingsNetwork End Device page
- View your Loko Air location on the integrated map
- Verify that location updates are being received at the expected intervals
Conclusion
With your Loko GPS Tracker now connected to TheThingsNetwork via LoRaWAN, you can enjoy extended range tracking capabilities and integration with IoT platforms. This setup provides a robust, scalable solution for tracking applications across large areas.